Java SpringBoot Swagger 적용하기
Postman보다 더 간편하게 사용할 수 있는 Swagger를 프로젝트에 적용했다
의존성 추가 (build.gradle)
// Swagger 의존성
    implementation 'org.springdoc:springdoc-openapi-starter-webmvc-ui:2.2.0'
설정파일 추가 (SwaggerConfig.java)
import org.springframework.context.annotation.Bean;
import org.springframework.context.annotation.Configuration;

import io.swagger.v3.oas.models.Components;
import io.swagger.v3.oas.models.OpenAPI;
import io.swagger.v3.oas.models.info.Info;
import io.swagger.v3.oas.models.security.SecurityRequirement;
import io.swagger.v3.oas.models.security.SecurityScheme;

@Configuration
public class SwaggerConfig {

    // OpenAPI 객체를 Bean으로 등록하여 Swagger 설정을 초기화합니다.
    @Bean
    public OpenAPI openAPI() {

        String jwt = "JWT"; // JWT라는 이름의 보안 스키마를 정의합니다.

        // 보안 요구사항 설정: "JWT"를 사용하여 보안 요구사항을 설정.
        SecurityRequirement securityRequirement = new SecurityRequirement().addList(jwt);

        // 보안 스키마를 구성합니다. 이 보안 스키마는 HTTP 타입으로 "bearer" 토큰을 사용.
        Components components =
                new Components()
                        .addSecuritySchemes(
                                jwt,
                                new SecurityScheme()
                                        .name(jwt) // 보안 스키마의 이름
                                        .type(SecurityScheme.Type.HTTP) // HTTP 타입의 인증을 사용
                                        .scheme("bearer") // Bearer 인증을 사용
                                        .bearerFormat("JWT") // Bearer 인증에 사용하는 포맷을 JWT로 지정
                                );

        // OpenAPI 객체를 생성하여 정보, 보안 설정, 컴포넌트를 추가합니다.
        return new OpenAPI()
                .components(new Components()) // 빈 컴포넌트를 추가 (불필요하지만 추가한 후)
                .info(apiInfo()) // API에 대한 정보 추가
                .addSecurityItem(securityRequirement) // 보안 요구사항 추가
                .components(components); // JWT 인증 스키마 추가
    }

    // API의 기본 정보를 설정합니다. 제목, 설명, 버전을 명시합니다.
    private Info apiInfo() {

        return new Info()
                .title("API의 제목")
                .description("API에 대한 설명")
                .version("1.0.0"); // API의 버전을 1.0.0으로 설정
    }
}
바로 적용할 수 있는 config 파일을 제공받았다
땡스투 J...
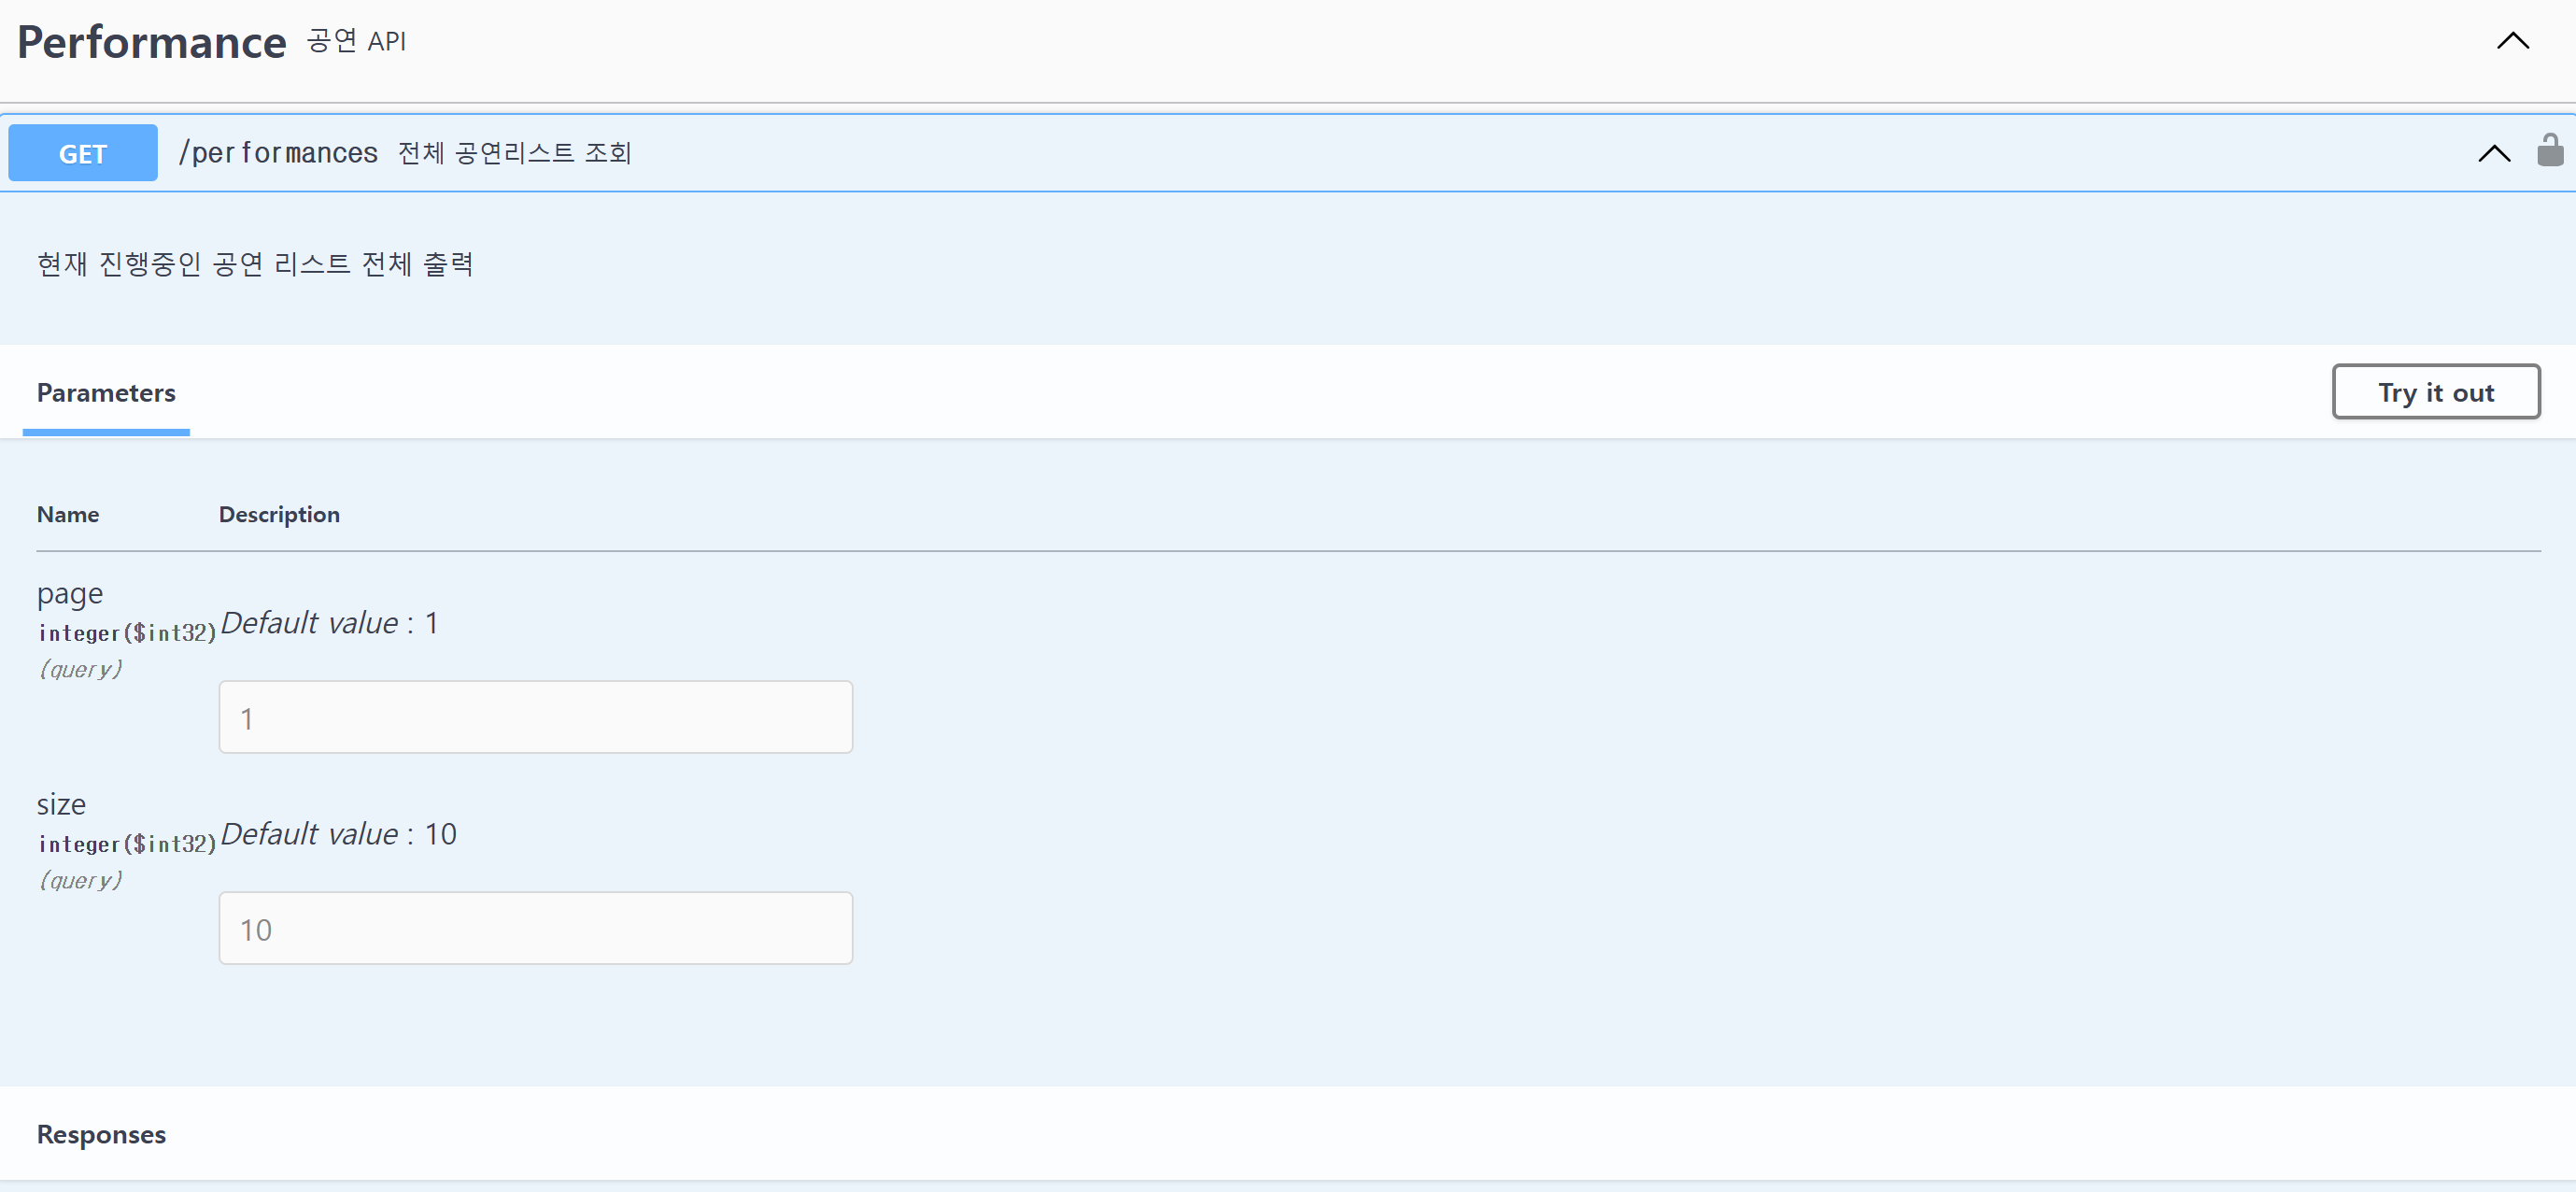
의존성을 추가하고 설정파일을 생성했다면 Controller에 적용해주면 된다!
@Tag(name = "Performance", description = "공연 API")
public class PerformanceController {

	// 생략

    @GetMapping
    @Operation(summary = "전체 공연리스트 조회", description = "현재 진행중인 공연 리스트 전체 출력")
    public ResponseEntity<ApiResponse<?>> getPerformances(
            @RequestParam(defaultValue = "1") int page,
            @RequestParam(defaultValue = "10") int size) {

        return ResponseEntity.ok(
                ApiResponse.success(performanceService.getPerformances(page, size)));
    }
}
@Tag, @Operation을 사용해 title과 설명을 지정해준다
summary와 description은 생략 가능
annotation을 아예 쓰지 않아도 자동 생성이 된다
Swagger GET Method RequestBody
GET Method에 대해 RequestBody를 사용하는 경우 Swagger에서 입력칸은 만들어 주지만 실행해보면 값이 넘어가지 않는다
논리적으로 생각했을때 GET은 요청값이 없어도 되지않나.. 라는생각
그리고 검색은 웹을 사용할때 보면 거의 requestParam으로 처리된다
꼭 필요한 상황이라면 @ModelAttribute로 대체가 가능하다
(swagger에서 직렬화 형태는 보이지만, 실제 form 방식으로 전달)
Swagger Request Form

코드에 설정되어있는 @PathVariable, @RequestParam, @RequestBody 모두 자동으로 읽어서 입력폼을 생성해준다
but!
RequestBody를 내부 클래스로 생성할경우 자동으로 읽히지 않는다!!
public class CreateCardDto {

    @Getter
    @NoArgsConstructor
    @AllArgsConstructor
    public static class Request {
        private String name;
        private String description;
        private LocalDateTime dueDate;
        private Long managerId;
        private Long listId;
    }

    @Getter
    public static class Response {
        private final Long id;
        private final String name;
        private final String description;
        private final LocalDateTime dueDate;
        private final Long managerId;
        private final Long listId;
        private final String fileName;
        private final String fileUrl;
        private final LocalDateTime createdAt;
        private final LocalDateTime modifiedAt;

        public Response(Card card) {
            this.id = card.getId();
            this.name = card.getName();
            this.description = card.getDescription();
            this.dueDate = card.getDueDate();
            this.managerId = card.getManagerId();
            this.listId = card.getListId();
            this.fileName = card.getFileName();
            this.fileUrl = card.getFileUrl();
            this.createdAt = card.getCreatedAt();
            this.modifiedAt = card.getModifiedAt();
        }
    }
}
이런식으로 사용하면 자동으로 읽히지 않는다..
설정이 있는데 못찾은 걸수도 ...
우선은 코드의 통일성을 위해 전부 수정했다.. ㅎ...

🥕🥕🥕🥕🥕🥕🥕🥕🥕🥕
+ 파일첨부 기능도 사용이 가능한데
이부분은 추후 업로드...
'TIL' 카테고리의 다른 글
| 왜 시스템 이미지라고 할까? Docker 를 학습하며 궁금했다 (1) | 2024.10.27 |
|---|---|
| 지랄 아니고요 지라입니다 Jira로 프로젝트 관리하기 Github 연동 (0) | 2024.10.27 |
| Spring Boot AOP 사용하여 Slack 사용자 멘션하기 (0) | 2024.10.18 |
| SpringBoot에서 첨부파일 처리하기 AWS S3 (0) | 2024.10.18 |
| QueryDSL (0) | 2024.10.17 |